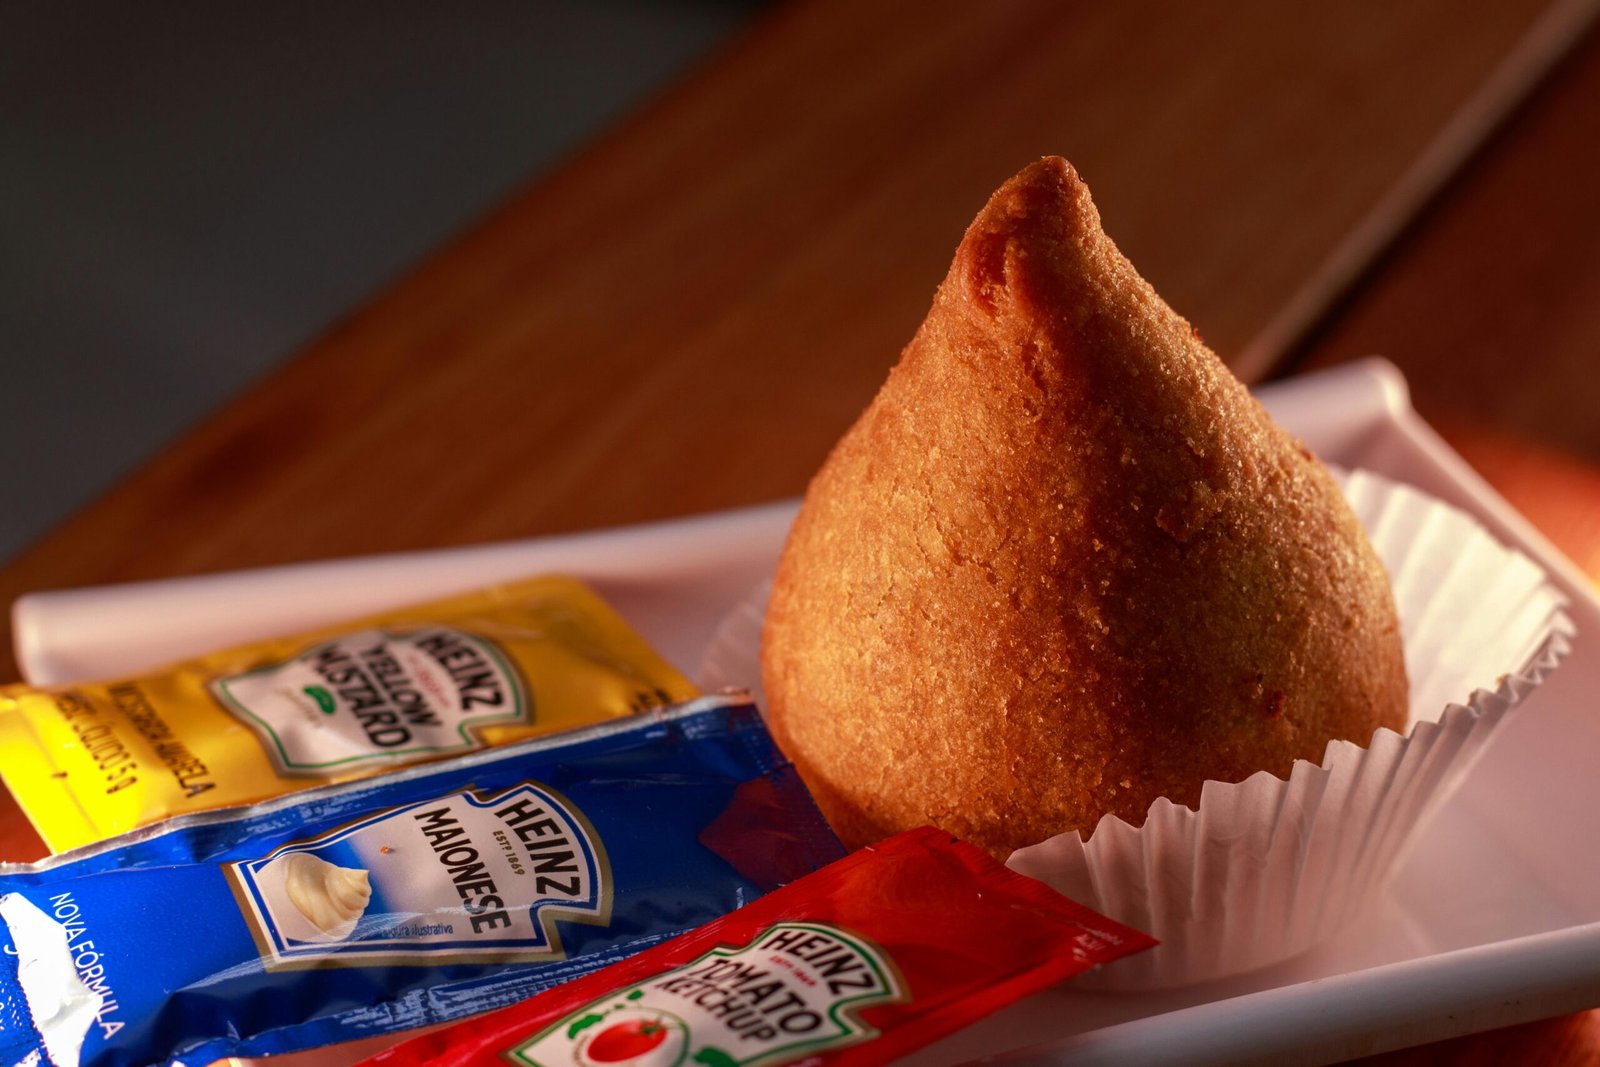
If you’ve ever walked the vibrant streets of Brazil, chances are you’ve encountered the irresistible smell of freshly fried Brazilian Coxinha. This iconic Brazilian snack is a golden teardrop-shaped delight filled with shredded chicken and a creamy, savory dough. In this comprehensive guide, we’ll take you step by step through a traditional Brazilian Coxinha recipe so you can recreate this favorite right at home.
📌 Table of Contents
- What Is Coxinha?
- Ingredients You’ll Need
- Step-by-Step Dough Preparation
- How to Prepare the Chicken Filling
- Assembling and Shaping the Coxinhas
- Breading and Frying
- Serving Ideas and Variations
- Storage and Reheating Tips
- Why You’ll Love This Brazilian Coxinha Recipe
What Is Brazilian Coxinha?
Coxinha (pronounced co-SHEEN-ya) is one of Brazil’s most popular snacks. The name literally means “little thigh,” referring to its shape, which mimics a chicken drumstick.
Meanwhile, coxinhas are beloved not only for their flavor but also for their nostalgic appeal. For many Brazilians, this treat is associated with childhood birthdays, snack bars, and quick bites at the airport or bus station.
Ingredients You’ll Need to Brazilian coxinha
To make this Brazilian coxinha recipe, you’ll need a few pantry staples and some patience. The good news? Most ingredients are affordable and easy to find, even outside Brazil.
Dough:
- 2 cups (480ml) chicken broth (from boiling the chicken)
- 2 tablespoons butter
- 2 cups (250g) all-purpose flour
- Salt to taste
Filling:
- 2 chicken breasts
- 1 tablespoon olive oil
- 1 small onion, finely chopped
- 2 cloves garlic, minced
- 3 tablespoons cream cheese or requeijão
- Salt and pepper to taste
- Chopped parsley (optional)
Breading:
- 2 eggs, beaten
- 1½ cups (150g) breadcrumbs
- Oil for deep frying
In addition, you may want a bit of extra flour for dusting your hands while shaping.
Step-by-Step Dough Preparation
The dough is what gives coxinha its unique texture. It’s smooth, flexible, and holds the filling beautifully.
- Prepare the broth: Boil the chicken breasts in water with salt, pepper, and bay leaves (optional). Once cooked, remove the chicken and save 2 cups of the broth.
- Make the dough: In a saucepan, heat the chicken broth and butter until boiling. Reduce the heat and add the flour all at once, stirring constantly.
- Cook the dough: Stir vigorously until it pulls away from the sides and forms a ball. This usually takes 3–5 minutes.
- Cool: Transfer the dough to a clean surface and let it cool slightly before kneading it for a smoother texture.
For example, if your dough feels sticky, dust it lightly with flour as you knead.
How to Prepare the Chicken Filling
Shredded chicken is the heart of this Brazilian coxinha recipe, and seasoning is key.
- Shred the chicken: After boiling, let the breasts cool and shred finely using two forks or a food processor.
- Sauté the aromatics: In a pan, heat olive oil and sauté the onion until translucent. Add garlic and cook for another minute.
- Combine: Add the shredded chicken, salt, pepper, and chopped parsley (if using). Mix well.
- Creaminess factor: Stir in the cream cheese or requeijão to make the filling rich and cohesive.
However, don’t overcook the filling—it should be moist, not dry.
Assembling and Shaping the Brazilian Coxinhas
Shaping coxinhas might look intimidating, but it gets easier with practice.
- Divide the dough: Roll the cooled dough into golf ball-sized portions.
- Shape: Flatten each portion into a disc in your hand.
- Fill: Place about 1 tablespoon of chicken filling in the center.
- Close and pinch: Bring the edges up and pinch them together to form a teardrop or drumstick shape.
Meanwhile, dust your hands with flour to avoid sticking.
You’ll be surprised how quickly your shaping improves!
Breading and Frying
This final step turns your coxinhas golden, crispy, and ready to devour.
- Dip: Roll each coxinha in the beaten egg.
- Coat: Then, roll it in breadcrumbs until fully coated.
- Fry: Heat oil to 350°F (175°C) in a deep pan. Fry 3–4 coxinhas at a time, turning occasionally, until golden brown (about 5–6 minutes).
- Drain: Remove with a slotted spoon and place on paper towels to drain excess oil.
In addition, keep the oil temperature stable to avoid soggy or greasy results.
Serving Ideas and Variations
Coxinhas are typically served with ketchup, hot sauce, or a touch of lime on the side.
However, you can easily adapt this Brazilian coxinha recipe:
- Mini coxinhas: Perfect for parties!
- Vegan version: Use mashed jackfruit or hearts of palm instead of chicken.
- Cheese filling: Mozzarella or catupiry cheese makes a great variation.
For example, some people mix corn and peas into the chicken for extra flavor and texture.
Storage and Reheating Tips
Can you make coxinha ahead of time? Absolutely. This snack freezes beautifully.
- To freeze: Place assembled, unfried coxinhas on a tray in the freezer. Once solid, transfer to a zip bag and store for up to 3 months.
- To reheat: Fry straight from frozen or air-fry at 375°F (190°C) until crispy and hot.
In addition, reheated coxinhas retain their crunch much better when not microwaved.
Why You’ll Love This Brazilian Coxinha Recipe
This is more than just a snack—it’s a taste of Brazil’s culture, warmth, and creativity.
- It’s crowd-pleasing and fun to make
- You can involve the kids in shaping them
- It works as a meal, appetizer, or party food
- It’s budget-friendly and freezer-friendly
Meanwhile, once you master this Brazilian coxinha recipe, you’ll want to share it with friends and neighbors—just like we do back home.
Final Thoughts
Bringing a little piece of Brazil into your kitchen has never been easier. This traditional Brazilian coxinha recipe combines flavorful chicken, creamy dough, and a satisfying crunch into one unforgettable bite—especially when paired with an ice-cold Guaraná Antarctica.
Whether you’re introducing this dish to someone for the first time or recreating a childhood favorite, coxinha is always a good idea.