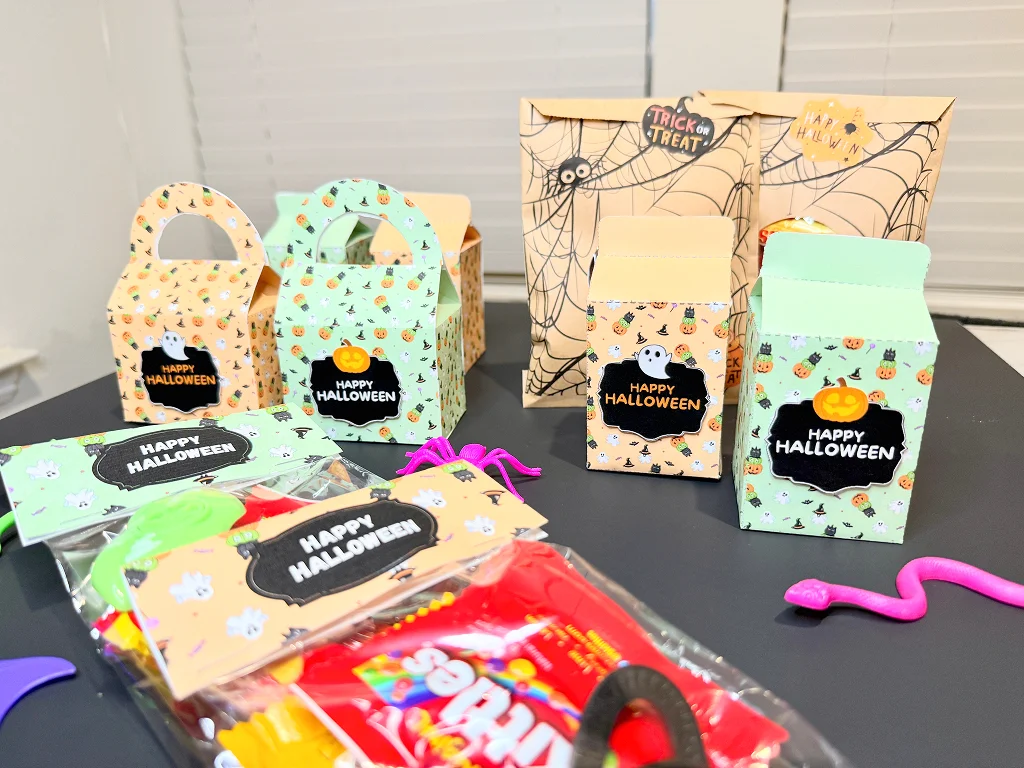
Halloween is the perfect time to surprise kids, friends, and neighbors with fun and creative Halloween treat bags. Instead of buying ready-made packages, you can add a personal touch by crafting your own custom Halloween bags. In this article, I’ll guide you through four different DIY Halloween gift bags, from printable milk box templates to cellophane bags with labels. The best part? You don’t need fancy tools or a cutting machine—just simple supplies and a little creativity.
1. Template Milk Box Halloween Treat Bags
If you’re looking for a different option that doubles as decoration, the milk box template is a fantastic choice. It looks like a mini Halloween gift bag, but it’s super simple to assemble. These personalized Halloween bags are great for parties and trick-or-treating.

Materials You’ll Need for Halloween Treat Bags
- Printable milk box template (you can purchase it here)
- Regular printer and paper (cardstock recommended for durability)
- Scissors
- Glue stick
- Double Sided Tape
- Craft knife
Step-by-Step Instructions
1 – Print the Template
Download the Halloween milk box printable and print it on cardstock for a sturdier finish.

2 – Cut Along the Lines
Carefully cut out the box following the solid outlines of the template with scissors, and use a craft knife to cut out the finer details.

3 – Fold on the Dotted Lines
Use a ruler or the edge of scissors to make sharp folds where indicated, or simply fold with your fingers if you find it easier. You can also lightly score the paper with a craft knife—just be very gentle so you don’t cut through the sheet, but only make it easier to fold.


4 – Assemble the Box
Apply glue on the flap and press the sides together until it forms a box. You can also glue the bottom part to make sure it holds the candy securely.


5 – Fill With Candy
Fill your Halloween goodie bags with candy, chocolates, or small toys.


6 – Close and Decorate
This box already has a built-in lock to keep it closed, but if you prefer, you can use a hole punch and tie a ribbon for extra charm. I also used double-sided tape to attach Halloween tags to the front.


👉 Want to try this at home? Get the ready-to-print milk box templates here.
2. Halloween Cellophane Bags With Printable Labels
For a quick and affordable option, Halloween treat bags made from cellophane are perfect. They’re transparent, so the colorful candies show through, and the labels make them festive.
Materials You’ll Need
- Small or medium cellophane bags (buy them here)
- Halloween printable labels (download them for free here)
- Printer and paper (cardstock or sticker paper works best)
- Scissors or paper cutter
- Tape or stapler
Step-by-Step Instructions
1. Print the Labels
Choose your favorite Halloween design (pumpkins, ghosts, bats) and print them.

2. Cut the Labels
Cut neatly around each design, or use a paper cutter for straight edges.

3. Fill the Bags
Place candy, cookies, or small toys inside the cellophane bags.
4. Seal the Top
Fold the open end of the bag.

Attach the Label – Fold the printed label in half and place it over the sealed edge. Secure it with tape or a stapler.
🎃 Tip: Mix different candy colors (orange, purple, black) to make the bag look festive without extra effort.
👉 You can grab a pack of affordable cellophane bags here and download the free Halloween labels here.
3. Printable Halloween Box with Round Handle
If you want something larger and reusable, a printable box with a round handle is a fun option. Unlike the milk box, this looks more like a Halloween gift bag. Perfect for creating personalized Halloween bags that stand out.
Materials You’ll Need
- Printable Halloween Box with round handle template (purchase here)
- Printer and paper (use cardstock or thick craft paper)
- Scissors
- Glue stick
- Double Sided Tape
- Craft knife
Step-by-Step Instructions
1. Print the Design
Use colorful Halloween-themed printables with ghosts, pumpkins, or witches.

2. Cut the Shape
Follow the solid lines of the template.


3. Fold the Flaps
Fold carefully along the dotted lines for clean edges.


4. Assemble the Bag
Glue or tape the side and bottom flaps together to form the bag.

5. Fill and Gift
This box already has a built-in lock to keep it closed. I also used double-sided tape to attach Halloween tags to the front. Fill the Halloween goodie bags with treats or small toys.


👉 Get the ready-to-use Halloween Box with Round Handle printables here.
4. Paper Kraft Halloween Bags
For a rustic and eco-friendly vibe, kraft paper bags are an excellent option. You can decorate these Halloween treat bags with stickers, drawings, or printed images.
Materials You’ll Need
- Plain kraft bags (buy them here)
- Printable Halloween images (download them for free here)
- Glue stick
- Scissors
- Markers or stickers (optional for extra details)
Step-by-Step Instructions
1. Choose the Decorations
Select printable Halloween designs like black cats, skeletons, or haunted houses.


2. Print
Print the images and carefully cut around them.

3. Fill With Candy
Fill the Halloween gift bags with candy.
4. Seal or Tie
Fold the top down and secure with tape, or punch two holes and tie with ribbon.

👉 You can purchase plain kraft bags here and download free printable Halloween images here.
Final Tips for DIY Halloween Treat Bags
- Use Bright Colors – Orange, purple, black, and green make your Halloween bags pop.
- Mix Treats and Toys – Small glow sticks, stickers, or spider rings make great fillers for Halloween goodie bags.
- Keep It Simple – You don’t need fancy tools. Scissors, glue, and creativity are enough.
- Make It Fun for Kids – Let children decorate their own personalized Halloween bag.
Conclusion
Making your own Halloween treat bags is not only fun but also a great way to add a personal touch to your celebration. Whether you choose printable milk boxes, simple cellophane bags, tote-style printables, or kraft custom Halloween bags, each option will delight trick-or-treaters and party guests.
Grab your printables and supplies today, and start creating unforgettable Halloween gift bags at home!
Get ready for a spooky season! Check out more Halloween ideas here and start preparing for the perfect celebration. 🎃